- When starting a script.sh always start with (#/bin/bash)
- ./script.sh (How to test the script)


- To get to home directory ‘cd ~/’
- cd.. files above
- ./ current folder

- Delete files and folders within a Path safely if needed.
find ~/delete/Path/ -type d -print0 | xargs -0 -I {} /bin/rm -rf “{}”
- -rf: Recursively force shutdown
- cd / : Root file structure
- cd ~/ takes user directory
- cd /home/darian/
- cd ~/


Linux Distributions:
- Android
- CentOS
- Ubuntu
- SUSE
- RedHat Enterprise Linux
- Raspberry Pi
- Kali linux
- Open SUSE
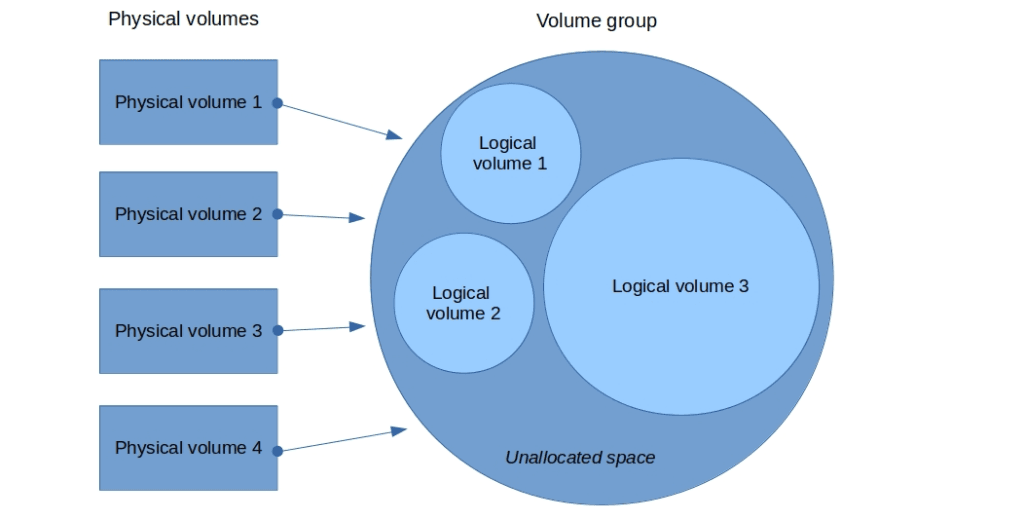
LVM-Logical Volume Manager
- Adding all the different storage devices into 1 Big storage device or even 1 Big and 1 Small storage device that will output 2 storage devices.

Configuring the Linux Environment
- BIOS/UEFI (Basic Input Output System/Unified Extensible Firmware interface)
- Master Boot Record (MBR) on boot disk launched
- Bootloader (GRUB) launched (Right shift Key)
- Linux Kernel loaded into memory
- Init executes config file targets (runlevels)
- Display manager loaded
- Desktop loaded
Grub – Filename into favorite search engine. Sudo update grub tool.
Linux Runlevels
- 0 – System halt
- 1 – Single -user (rescue) mode
- 3 – Multi-user mode with GUI
- 5 – Multi-user mode with GUI
- 6 – Reboot
Multi-user system – More than 1 person will be able to log in at the same time.
- Runlevels – systemctl
- Target – systemctl get – default
Everything in Linux is a text file.
The Linux File System
Unix file system Hierarchy standard
Directory = Folder
ls / = Directories
ls -r = printing results in reverse alphabetical order.
ls -l -r = listing reverse alphabetical order
ls -rl
ls -lr = longlisting in reverse alphabetical order
( – ) regular file
l = symbolic link
s = socket
p = pipe
b = block file
c = character file
su – = lets you termporarily act as a different user
su -l =
su –login
head – shows the top few lines of the file.
head -n 5 file – The number of lines it will display
tail – shows the bottom lines of the file.
grep – can be used to filter out information. Interpret much more Search patterns.
variable = value and then $value
The HISTSIZE variable defines how many previous commands to store in the history list.
Examples include the PATH, HOME, and HISTSIZE variables.

Anchor Characters
One of the ways regular expressions can be used to narrow down search results. For example the pattern root appears many times in the /etc/passwd file:


Shutdown
Shutdown has a few things to cover.
Sign in as root first – (su -)
Shutdown +1 “Goodbye World!” – Displays the message after saying that the system is going to shutdown after 1 minute.
Shutdown (Time) – It will shutdown at that specific time.
PS – command is used for listing processes.
Package Management
- installing packages
- sudo apt install
- cowsay
- apt-cache search cow
Updating packages
- sudo apt update
- sudo apt upgrade
Removing packages
- apt remove
- apt purge

Redirection
>

Using Text Editors
VI – Different Modes to Vi.
- Command mode
- Insert mode
- Ex mode
Click Esc to return to command mode.
Command Mode
Used to type commands, such as those used to move around a document, manipulate text, and access the other two modes.

Command Mode Actions

Delete

Change

Yank

Put

Searching in Vi

Insert Mode

Ex Mode

DD – similar to copy (disk)
dd – uses special agreements to specify how it will work. Used with (if, of, bs, count)
if = input file
of = Output file
bs = block size
If you cancel the dd you have to wait for it to deblock everything before removing it or it will break the disk.
Permissions
- u = User
- g = Group
- o = Owner
- a = All
Managing Linux Environments
- Locale – Language + Region
- cd /usr/shore/il8n/locales (Settings)
- localectl status = Both views + Edit locale settings.
- Pwd = present work directory
- echo $Pwd = Output Value of Pwd
- myval = 5
(echo $myval 5) - History
-wget
Managing System Hardware
- df – shows block of files
- lsblk | grep sd
- cd /etc/apt
- ll -h (Human readable format)
- ls/ll – list
- wc – counts lines, words of what you send it
looking for software + Don’t know name = apt search
Tips
- Blue file = Directory
- Green = Executable
- Red = Archive/Compress file
- White = Files
- Less = More
- Touch = create
- !$ = Runs the last line for the previous command
- Cat file = Print onto commandline
- Q = Quit
- Ctrl + D / Ctrl + C = Quit
- More = less (Never use More)
Linux Package Managers
- $ sudo nano /etc/apt/sources.list
- $ ls /etc/apt/sources.d
- $ sudo apt update
- $ apt search glabels
- $ apt show glables
- $ sudo apt install glabels
Working with the Linux server
Server Applications : Apache, NextCloud, Yum, Snaps
LXC ( Linux containers)
if using Ubuntu = LXC
Build Rocky linux Container
Ubuntu –
- sudo apt install linux – source \
- linux-headers – ‘uname -r ‘ \
- build – essential makes gcc automake cmake
- boostrap-it.com/linux.com/start
NMap- Copy link put in terminal
Debian – APT/DPKG
SUSE – ZYPP
Red Hat Enterprise linux – Yum/RPM (DNF)
Arch linux – Pacman
Command list continued:
- cat/less – Used to type out a file (or combine files)
- head – Used to show the first few lines of a file
- Tail – Used to show the last few lines of a file
- Man – Used to view documentation
- | (pipe) – Separates the first as the input and the second as the output
Three basic elements :
- Command – Name of the program or script you are executing
- Options/switches – Modify command. Usually starts with one or two dashes (-p or –print)
- Arguments
Sudo:
- Administrative privileges when required.
- Allows users to run programs using the security privileges of another user, generally root (user)
1) su password:
- su + enter
- root + password
- (su Password:)
2) Create configuration file for user:
- echo “darian All = (All) All” > /etc/sudoers.d/darian
3) Chmod 440 /etc/sudoers.d/student
- Change permissions
Move files:
- mv (file/ what wanting to move)(to wherever wanted) (use / directories)
Renaming:
- mv (original name) (name wanting to change too)
pwd
- Print working directory (Shows you are in the right path/place)
less/ cat/ more :
- Does similar/same thing
mv ..
- Moves to previous directory (Parent Folder)
cp
- copy files
- E.g reptiles /cobras snakes (cobras is being moved copied into the snakes directory)
rm
- Remove
rmdir-
- Remove Directory
- rmdir reptiles
File Security
- Ls -l
First character will always be either ( – ), which means its a file, or a ( d ), which means its a directory.
CHMOD:
- 644 ( 6 = User, 4 = Read, 4 = Files)
- Readable = 4 (R)
- Writable = 2 (W)
- Executable = 1 (X)
If any above are turned into ( – ), it means that the permissions have been revoked.
- rw- =Readable, Writable but no executable
- r– = Group can only read
Owner/User | Groups | Others
Owner = rwx
User = –x
Others = -w-
Chmod – Change security permissions on files (Change Mode)
The “nine” security characters are collectively called the security “Mode”
- Chmod O
(+)
Adding permission
- Chmod O+
Adding executable permissions
- Chmod O+X
Specify file that am Changing
- Chmod O+X gorillas
Change multiple permissions at once
- E.g take all permissions away
- Chmod ugo-rwx gorillas
Wild Cards
- * allows you to specify more than one file at the sametime. (Anything)
Eg *ing
- ? (match)(One Character)
- “Sport” > “Spat”
- use sp??t can’t match spat. (sport, the p matches but the O does not)
- Chmod g+w* (group + write + All files)
Installing WordPress
- install Apache2
- sudo apt install apache2 -y
- hostname -I

- Use the host name and put it into web browser
- install PHP
- sudo apt install php -y
- Now you need to first look for the HTML and then delete it.
- cd /var/ www/html
- create new index.html file and edit it.
- sudo nano index.php
- Paste following syntax into the file:
- <?php echo “hello world”; ?>
<?php echo date(‘Y-m-d H:i:s’); ?>
<?php phpinfo(); ?>
- <?php echo “hello world”; ?>
- close the file and make sure it saved.
- reboot Apache2 just to make sure that the syntax you inputted works on the website and displays the text.

- This is what we want to see. This is how you know it works.
- Next we will need to install MySQL onto the Raspberry Pi
- sudo apt install mysql-server php-mysql -y
- Once installed restart the Apache2 service. So we are not rebooting the whole machine but we are rebooting the service so the website basically.
- Once we have done this now we can star to install WordPress itself.
- You will need to delete the what is inside the index.html directory. Doing this makes sure that this is a clean install.
- cd /var/www/html
- sudo rm *

- So we need to now install wordpress from the internet by using the command wget and as you can see the command is zipped that we are going to be using becuase of the tar.gz syntax.
- sudo wget http://wordpress.org/latest.tar.gz

- Now we need to extract the content from the zip file:
- sudo tar xzf latest.tar.gz
- We want this content to be moved to the html directory.
- sudo mv wordpress/* .

- before carrying on I think it is good to neaten things up a little bit.
- sudo rm -rf wordpress latest.tar.gz
- This command forceably removes any file within the directory that has latest.tar.gz.1

- Now we need to set the Apache user as the owner of the directory:
- sudo chown -R www-data: .
- After that the next thing we need to be doing is configuring MySQL
- sudo mysql_secure_installation

- When it asks questions you need to say yes to mainly everything.
- Remove anonymous users
- Disallow root login remotely
- Remove test database and access to it
- Reload privilege tables now
- Now we need to create the WordPress Database:
- sudo mysql -uroot -p
- it will ask you to input the password to proceed.
- Remember I used a password to get onto the raspberry Pi, where some people use public key authentication rather which you don’t need a password for.
- This opens the MariaDB monitor as well as giving the root user database privileges.The reason why we can use capital letters in this case is because we are in the database so we do not need to be case sensitive.
- create database wordpress;
- GRANT ALL PRIVILEGES ON wordpress.* TO ‘root’@’localhost’;
- FLUSH PRIVILEGES;
- Then exit the database by using:
- CTRL + D
- Installing and configuring WordPress
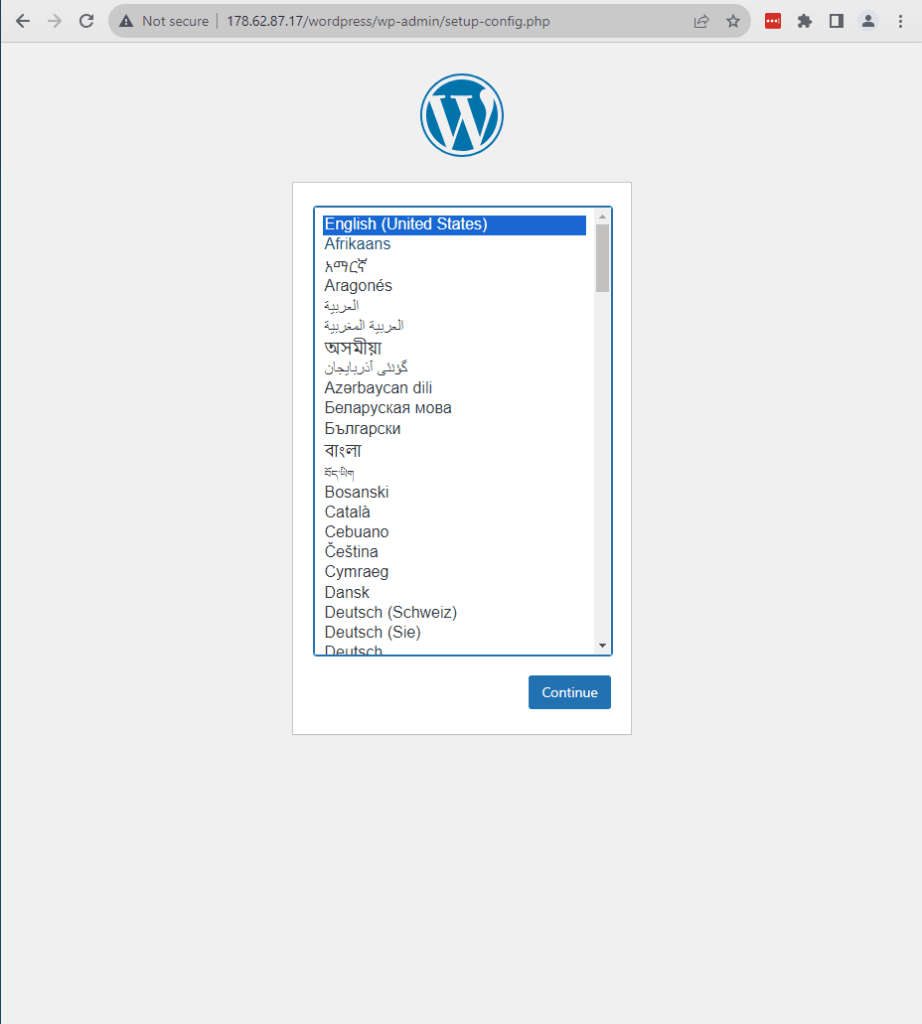
When you load up the page you will see this. All you need to do is click on the file and it should load up WordPress for you.


http://178.62.87.17/wordpress/wp-admin/setup-config.php?step=1&language=en_GB
All should be good from here as we completed everything was needed.
Install phpMyAdmin
I will list all the commands in order for the process of installing phpMyAdmin
- sudo apt install phpmyadmin
Select Yes on the control panel
follow the steps provided.
- sudo mysql -u root -p
- GRANT ALL PRIVILEGES ON *.* TO ‘root’@’localhost’;
Then we need to Configure the Apache for PHPMyAdmin
- sudo nano /etc/apache2/apache2.conf
- Include /etc/phpmyadmin/apache.conf
- sudo service apache2 restart
Accessing PHPMyAdmin
In your browser paste this:
- http://192.168.1.108/phpmyadmin
Then phpMyAdmin should load after you select the folder


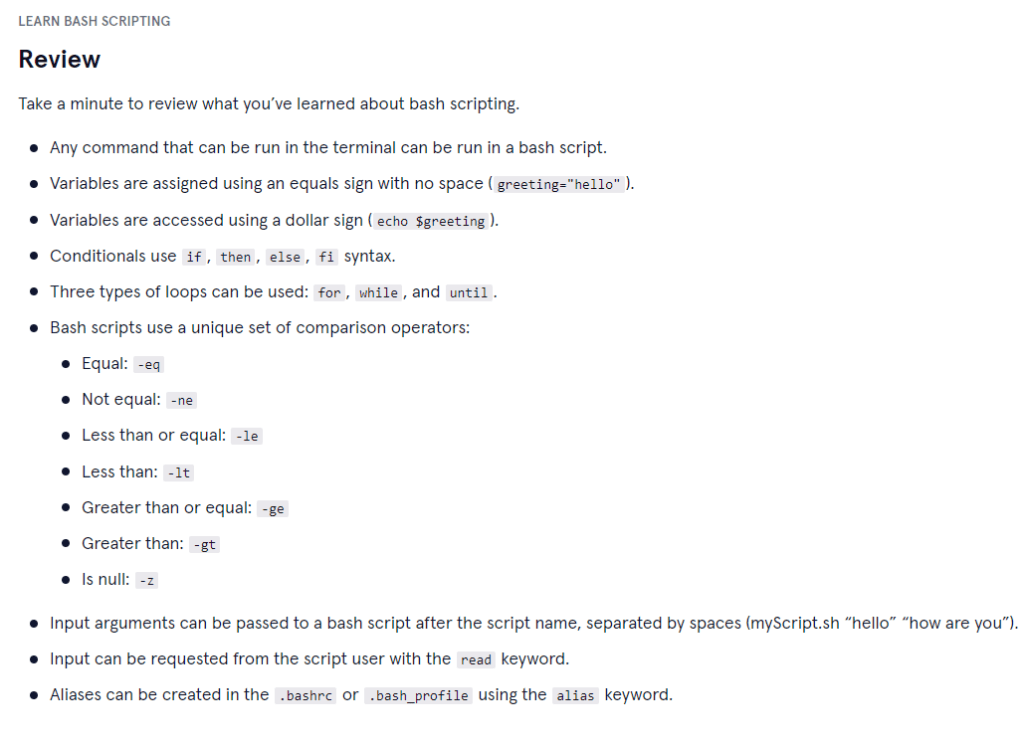
Writing a Bash Script
Things to know when writing a script:
- Usually have a ‘.sh’ extension but it is not really required.
- if we want to make the script executable and then run it, use the command.
- chmod +x myscript.sh
- ./myscript.sh
- They are used for system administration, file manipulation, data processing, and automation.
They are very good for repetitive tasks and streamlining complex operations through the use of variables, loops, conditionals, functions, and other programming constructs. - You can also with Bash scripts, you can interact with the operating system, run other programs, ans handle input and output streams.
Essential Commands needed for a simple bash script:
- #!/bin/bash – Also known as the “shebang” tells the system which interpreter to use when executing the script.

- ‘ # ‘ – Use of comments to add an explanations and documentation to your script.

- Variables – Variables are used to store and manipulate data in Bash script.

- Command substitution – You can capture the output of a command and assign it to a variable using command

- Input and Output – Use ‘echo’ to display output and ‘read’ to read input from the user.

- Conditional statements – Conditional statements allow you to make decisions in your script based on conditions.

- Loops – Help repeat a block of code until a certain condition is met
For Loop:

While Loop:

- Functions – Functions allow you to define reusable blocks of code.

- Exit status – You can exit the script with a specific status code using ‘exit’

Hello World:
-Created the file and then added the text


Sleep:
-Created the file and then added the text.


comments:
-Created the file and then added the text.


Done:
-Created the file and then added the text.


User Input:
-Created the file and then added the text.


Loops:
Created a Whileloop:


forloop:


Array:


Conditional statements:


Functions:


Display String Length:


Extract String:


Find and Replace String:


Concatenate Strings:


Check if a Number is Even or Odd:


Generate Factorial of Number:


Create Directories:


Read files:


Print Files with Lines Count:
Added cars firs and then created a new file to print the data.


Result of the printlines.sh

Delete Files:
Deletes the files pretty self explanatory.


Арматура диаметром 32 мм, изготовленная из стали марки А500С, является одним из самых востребованных видов металлопроката в строительстве. Она применяется при возведении фундаментов, армировании стен и перемычек. https://armatura32.ru